Place nodes & instances
A deployment view shows where your software runs. This guide fills one environment with the four base types: deployment nodes (environments, regions, clusters, hosts — the main pieces of infrastructure), infrastructure nodes (load balancers, gateways, message queues — the plumbing), container instances (deployed copies of containers from your C4 model), and system instances (deployed copies of external systems). The guide also covers building and reusing templates and connecting environments with linked instances.
Before you start: pick an altitude
Deployment has its own zoom, independent of C4 levels. Choose one altitude for the view and stay there:
- Conceptual — environments and tiers, no vendor detail. For architects, reviewers, customers.
- Platform — named platform constructs (clusters, node pools, managed services). For platform and app engineers.
- Physical — concrete instances, sizes, zones, networking. For ops and whoever provisions it.
Mixing altitudes on one canvas serves no single reader well.
Step 1 — Add deployment nodes
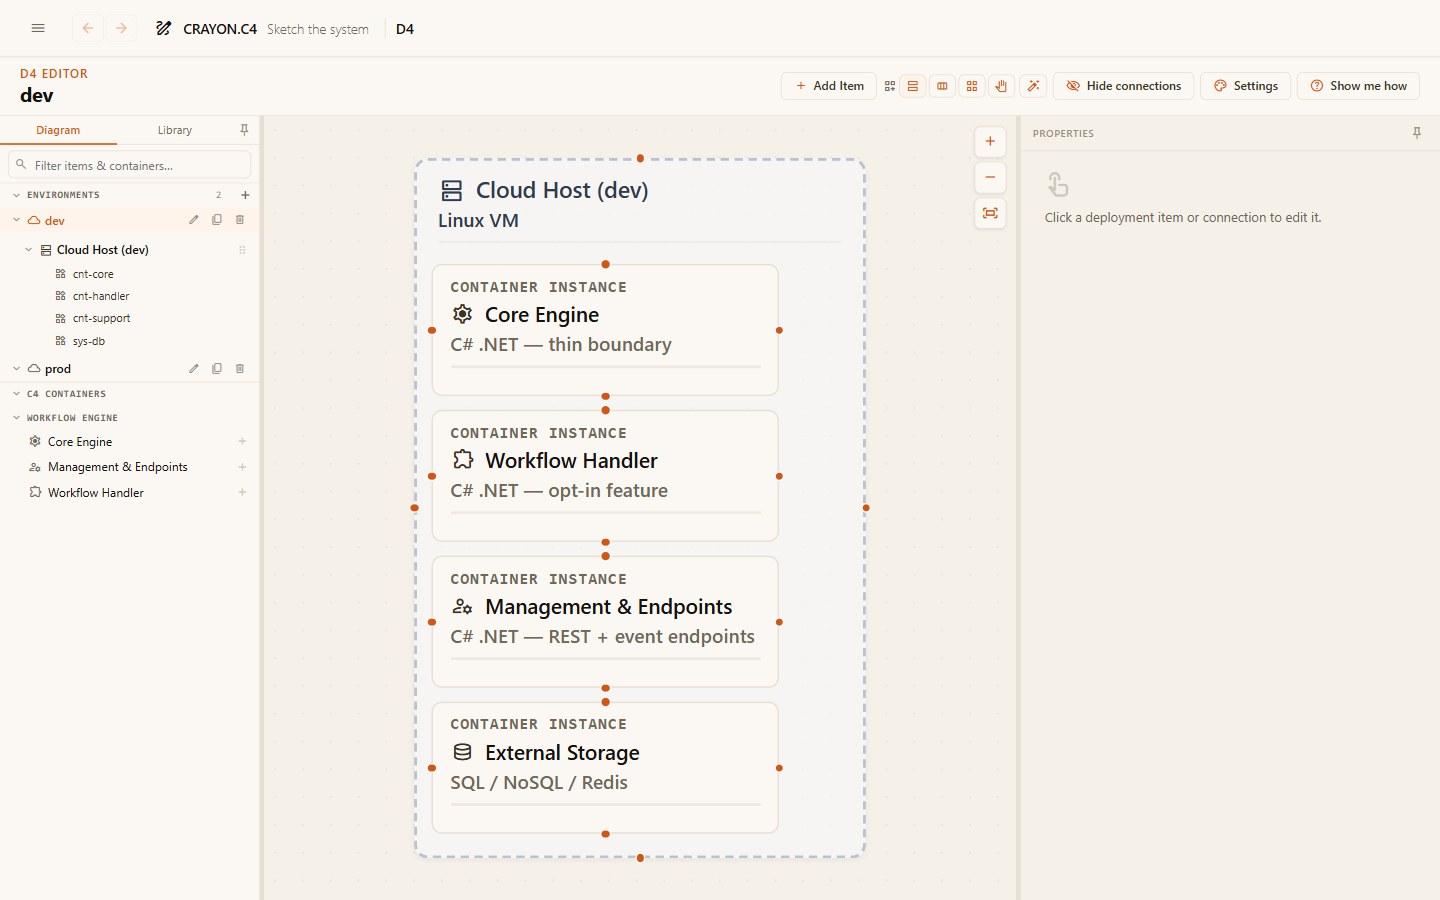
Inside your environment, add deployment nodes for the infrastructure at your chosen altitude — a region, a cluster, a host, a managed service. Nest nodes to show containment: a region holding a cluster holding compute hosts.
Step 2 — Place container instances
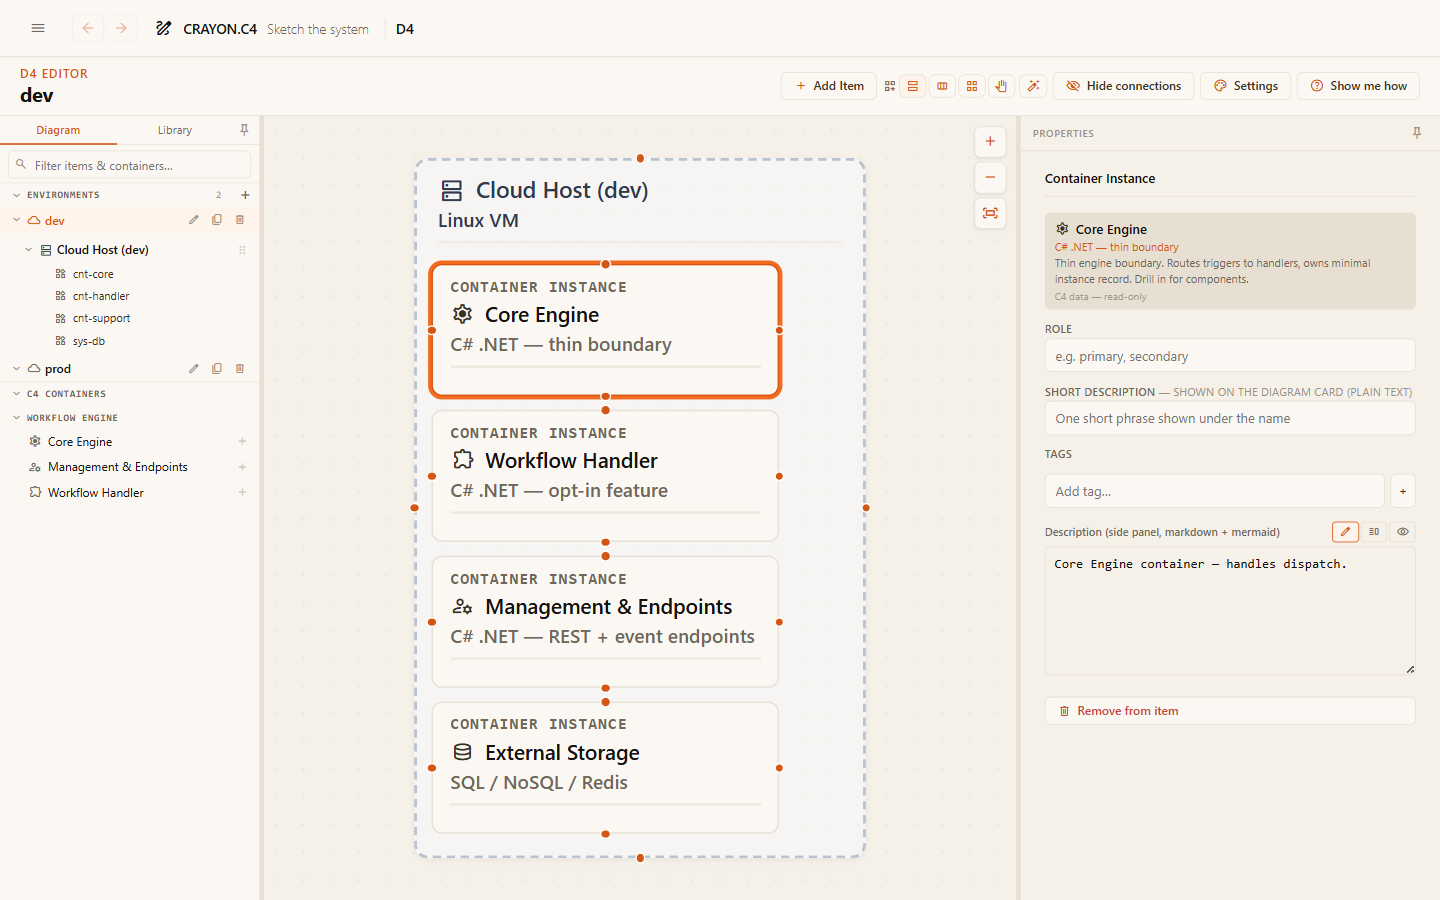
Place container instances inside the nodes that host them. Each instance links back to a container from your C4 model — pick the container from the list rather than typing a new name. That link is what keeps "what the system is" and "where it runs" in agreement.
Step 3 — Read it in the viewer
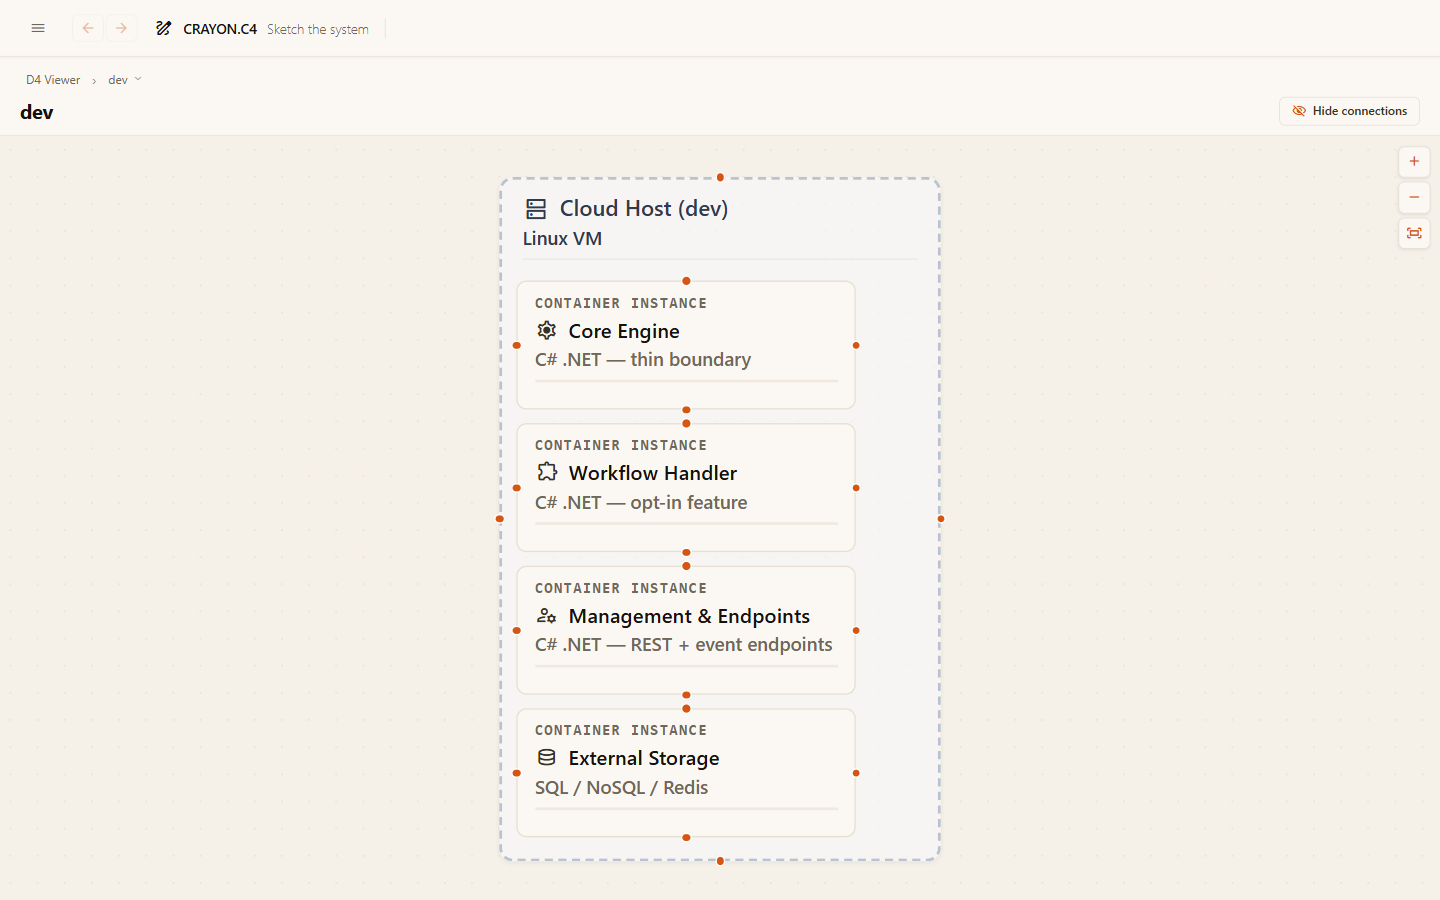
Switch to the Deployment viewer. The canvas draws the nesting as boxes-in-boxes; click any instance to see its details and the container it deploys.
Edit an item's properties
Select a node or instance in the left sidebar to open its form on the right. You can edit:
- Name — what the item is called.
- Tech — the technology it uses (e.g. "Linux", "Docker", "Kubernetes").
- Parent — move the item into or out of another node (see Nesting below).
- Icon — pick a visual icon to appear on the canvas card.
- C4 element type — classify it as a Deployment Node, Infrastructure Node, Container Instance, or Software System Instance. Container instances are locked to their type.
- Instances — a replica count (e.g.
3) or a range (e.g.1..N). Shown as a ×N chip on the card. Leave blank for a single instance. - Deployment group — optional grouping label (e.g.
zone-a). Inferred connections only link instances in the same group, keeping replicas from cross-connecting. - Display type — optional. Override the colour scheme with a custom display-type name; define colours in Settings → Type styles.
- Short description — shown on the canvas card beneath the name.
- Description — full markdown + mermaid, visible in the side panel.
Nesting by drag or Parent select
A deployment node can contain other nodes. Build a hierarchy by either dragging — grab a node in the left sidebar and drag it onto its parent — or selecting a parent in the Parent dropdown.
To un-nest a node, open its form, set Parent to "— Top level (no parent)", and confirm.
Child layout modes
When a node has children, choose how they arrange on the canvas:
- Inherit canvas default — use the default layout mode set for the diagram.
- Stack vertically (column) — arrange children in a column.
- Lay out horizontally (row) — arrange children in a row.
- Arrange in a grid — pack children into a grid.
- Manual — place children by hand; the parent still resizes to fit.
After choosing a layout mode, click Auto-arrange sub-items to apply it to the direct children. For deeper hierarchies, use Rearrange whole subtree to recursively apply the current node's layout to all descendants and resize every parent up the chain.
Copy an element
Select a node or instance and click the Copy button. A dialog opens offering two options:
- Linked Instance — the copy shares structure with the original. Changes to the name, tech, C4 type, or icon in one copy update the other. Useful when the same infrastructure setup repeats across environments.
- Independent Copy — a fully separate copy. You can rename, re-tech, or re-type it without affecting the original.
If you have multiple environments, choose which environment the copy lands in; otherwise it stays in the current environment.
Node resize
Nodes with children can be resized by dragging the corner handle on the canvas. The parent adjusts its size to fit its children whenever you change the layout mode or use "Auto-arrange sub-items".
Delete a saved template
The Library tab shows your saved templates and built-in starters. To delete a user template, right-click or long-press it and choose Delete. Built-in templates cannot be deleted.
Place a C4 container as an instance
The C4 Containers section in the left sidebar lists every container from your C4 model, grouped by system. You can add one to the environment two ways:
- Click a container to add a new container instance at the top level.
- Drag a container onto a node to place the instance inside that node.
Each instance links back to the container in your C4 model, keeping "what the system is" and "where it runs" in sync. If you drag the same C4 container twice into the same place, you get two instances of it.
Manage C4 nodes without leaving the deployment editor
The deployment editor's left sidebar hosts a C4 Model section — the same C4 node management panel as the C4 and F4 editors. Create, rename, retype, reparent, or delete a C4 element there and the change writes the one shared model. Selecting a node opens its full form in the right pane. This lets you add a missing container and immediately drag it from the tree onto the canvas (or onto a deployment item) to place an instance, without switching to the C4 editor first.
Infrastructure nodes and other plumbing
Load balancers, API gateways, message queues, and caches are part of the topology and deserve a place on the diagram — but only when connected. Add an infrastructure node for each piece of plumbing that shapes how your containers talk to each other or the outside world. Name it for what it does ("API Gateway", "Queue broker", "Cache layer"). Keep infrastructure nodes at the same level as the nodes they serve — plumbing usually reads best as a peer, not a wrapper.
Container and system instances
A container instance is a deployed copy of a container from your C4 model. It links back to that container, keeping the logical view and the deployment view in sync. A system instance is a running copy of an external system (one you don't control) — treat it the same way, placed in its own node or on the same node as containers that call it.
When you place an instance, pick its logical counterpart from the list rather than typing a new name. That link is what keeps "what the system is" and "where it runs" in agreement.
The fan-out is the point
A single logical container often runs as several instances (replicas across zones). One node may host several different containers. Showing that fan-out — three instances of the API here, one of the worker there — is exactly what this diagram exists for.
Build a template library
Reusable stacks save time when you have several environments or similar services. In the deployment editor, switch to the Library tab and drag a node, instance, or whole group onto the canvas to start a template. When a structure repeats across environments (for example, "an API instance + a worker instance + a queue in a cluster"), select that structure and choose Save as template. Name it something descriptive ("API worker cluster", "Cache setup"). Later, drag the template from the Library onto any environment and it drops as a complete pre-wired unit — edit names or links if the environment differs.
Linked instances and instance groups
When an environment structure repeats exactly — the same instances in the same node setup across multiple environments — link them instead of copying. Select the placed instance, click Copy, and in the dialog choose Linked Instance plus the target environment (the other option, Independent Copy, makes an unrelated duplicate). Linked instances stay in step: when you rename one, delete one, or change its C4 link, both copies update. This keeps staging and production instances in step without manual maintenance.
Pitfalls
- Inventing containers here. Every instance should trace to a container in your C4 model; a box that exists only in deployment means the views have drifted.
- Mixing altitudes. Conceptual tiers next to concrete instance sizes.
- Modeling infrastructure you don't deploy. Show the topology your system occupies, not the whole account.
Where next
- Connect the infrastructure — show what talks to what.
- The deployment model — altitude and per-environment thinking.