Create a process and lanes
An F4 flow shows how work moves through your system: steps, decisions, and hand-offs organized into lanes. This guide gets you from nothing to a lane structure ready for activities. The concept behind it: The F4 flow model.
Step 1 — Create a process
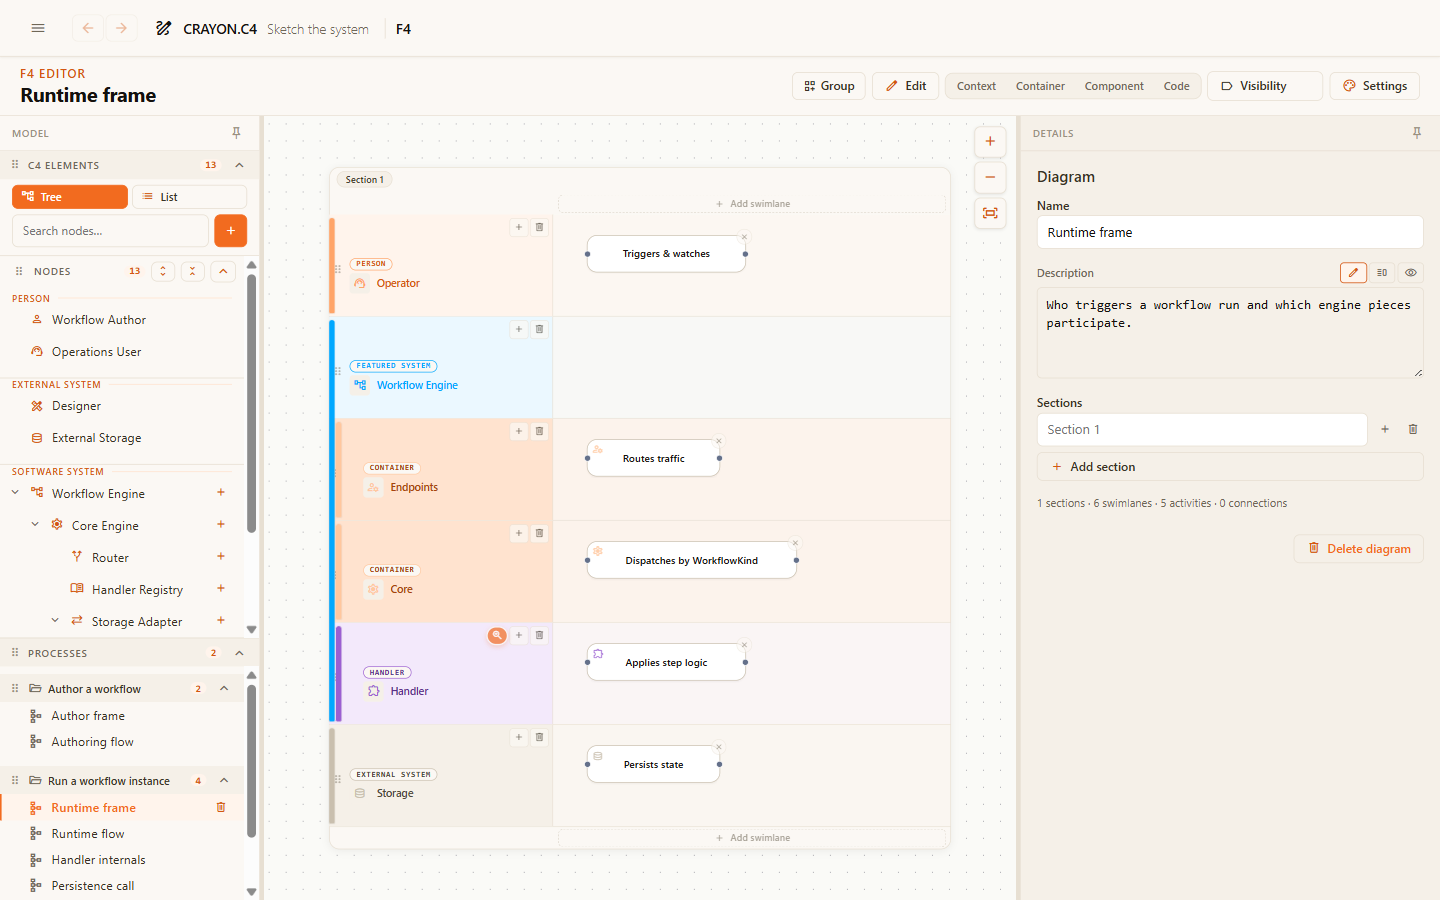
Open the Flow (F4) editor from the menu. In the left sidebar, add a process — the piece of business behavior you're describing ("Handle a claim", "Onboard a customer"). Each process holds one or more flow diagrams; a new process starts with one.
Step 2 — Add lanes
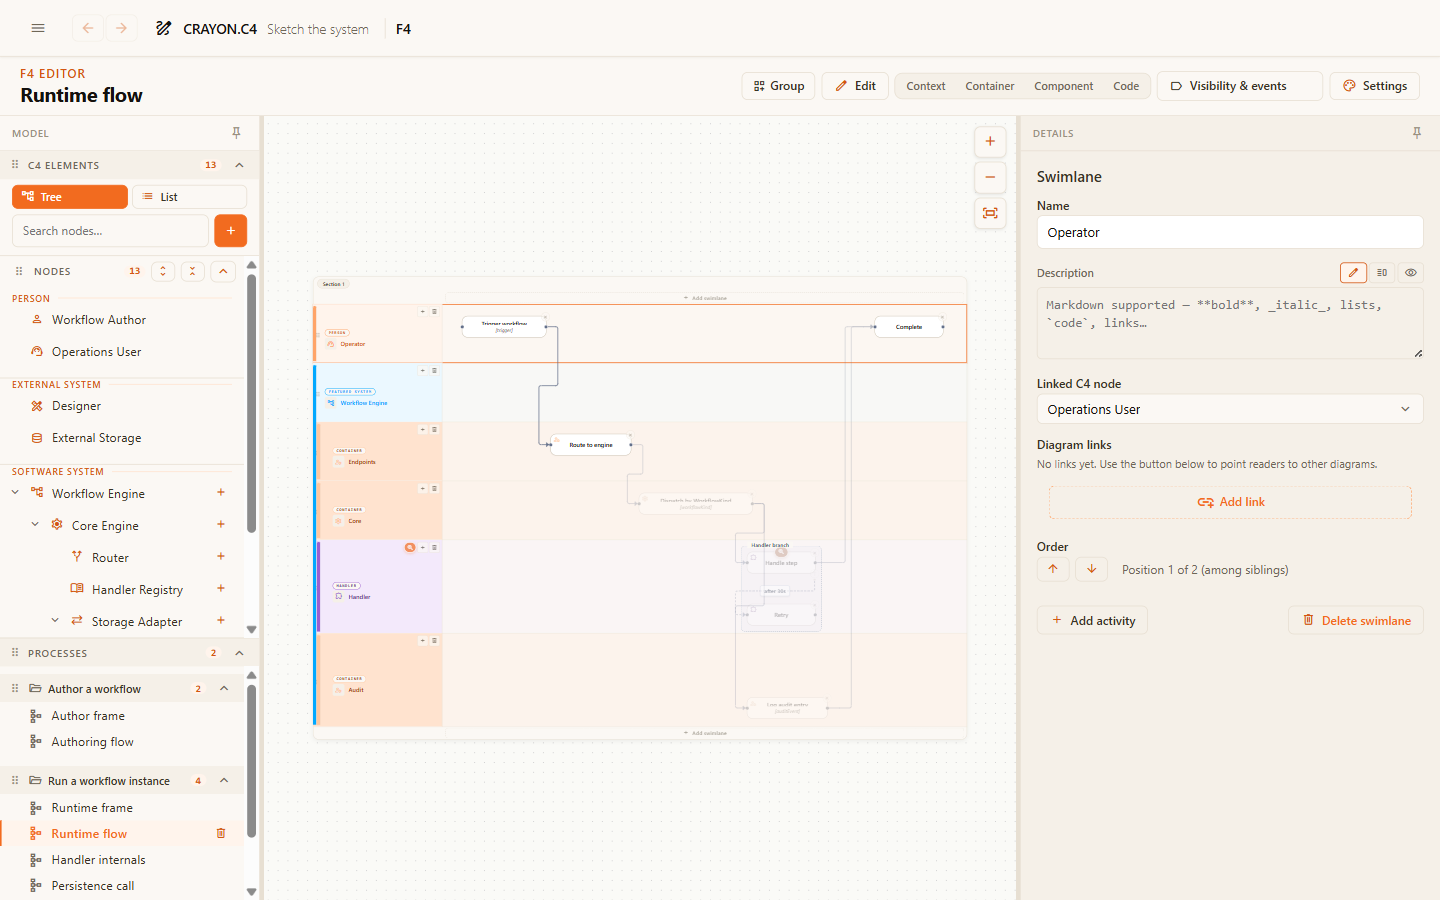
Add lanes — one per actor or system part that does work in this process: "Claims Handler", "Claims API", "Payment Provider". Where a lane is one of your C4 elements, bind it: pick the element in the lane's form. Bound lanes stay in sync with your structure and enable zoom-level reading.
Step 3 — Nesting happens by itself
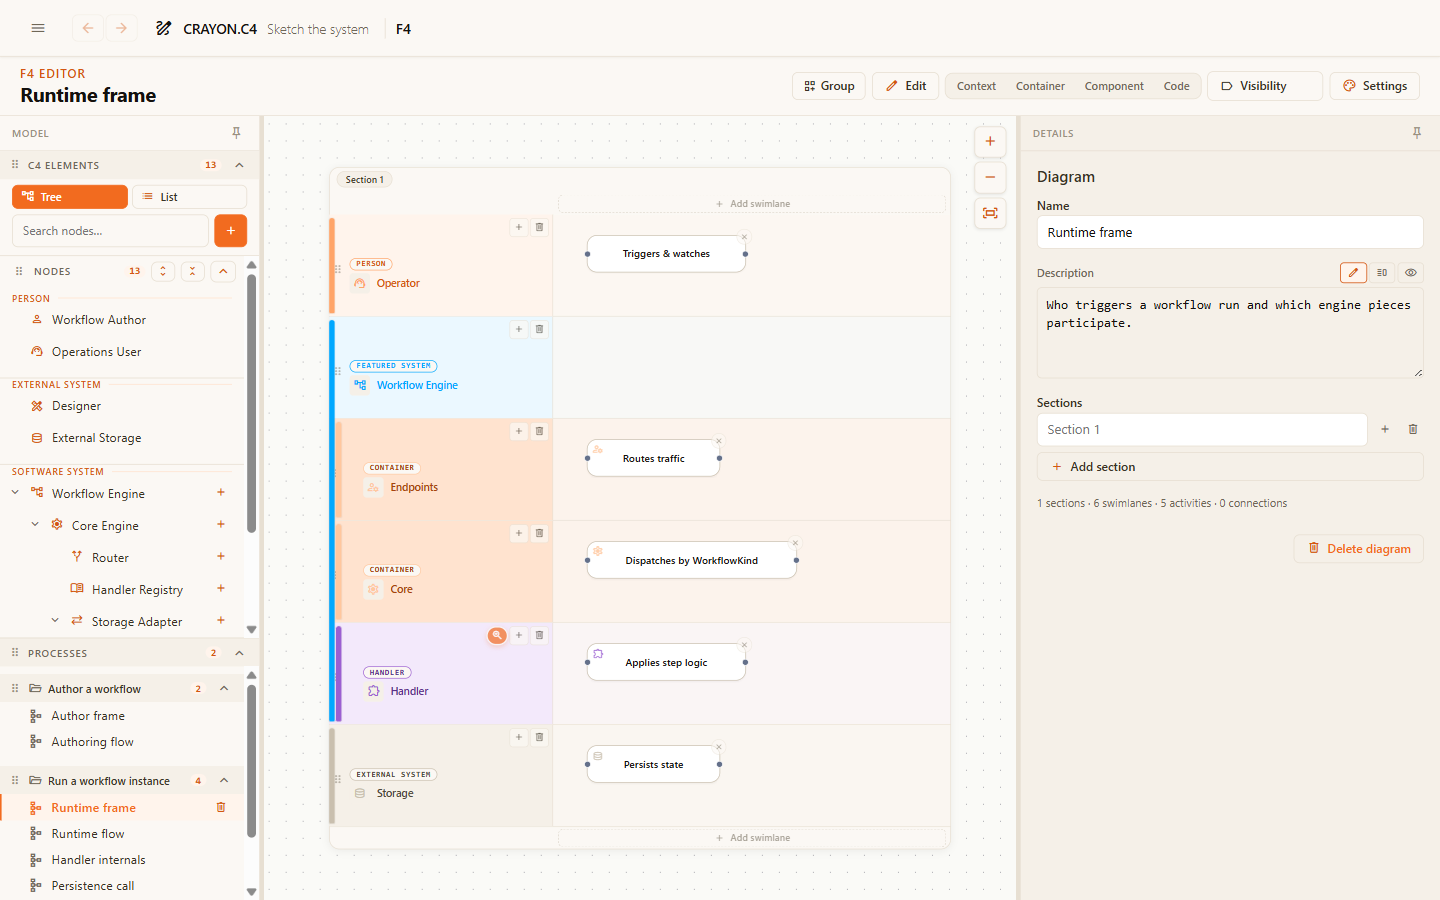
Lanes bound to C4 elements nest automatically following the structure: lanes for containers tuck inside the lane of their parent system. You read the ownership directly off the canvas.
Reorder lanes
Within a section (or among top-level lanes), you control the left-to-right order. Open a lane's form and find the Order row. Up/down arrow buttons move the lane among its siblings; the counter shows "Position X of N" so you know where you are. Dragging the lane header on the canvas also reorders it (at the Code level, where the board is edited).
Add activities and child lanes from the form
When you select a swimlane, its details form shows two action buttons at the bottom:
- Add activity — quickly insert a new activity into this lane. The new activity opens in rename mode so you can type its name immediately.
- Add {type} lane — if the lane is bound to a C4 element, this button appears with the type of container it can hold (e.g., "Add Container lane" if this lane represents a System). Click it to create a child lane with the correct C4 binding.
These shortcuts let you build the lane structure without switching back to the canvas.
Organize with sections
By default, a diagram has one section — a horizontal band where all top-level lanes live. For larger flows, split them into sections so readers can focus on one part at a time.
Open the Diagram form (select the diagram from the left tree) and scroll to Sections. Each section shows:
- A name field — optional, defaults to "Section N". Name it for the phase or responsibility it covers ("Request phase", "Approval lane", "Payment processing").
- An add button — quick way to insert a new lane at the bottom of this section.
- A delete button — remove the section and its lanes. (You can't delete if only one section remains.)
Click Add section to create a new one. Sections stack top to bottom in the order they were created; move a lane between sections by editing its Section field (for a top-level lane).
Seed lanes from C4 containers
If you've already modeled your C4 structure with containers, you can jump-start lane creation. When you add a new diagram or open an existing one for the first time, if containers exist in your C4 model, CRAYON-C4 offers a lane-seed picker modal: "Seed lanes from C4 containers?"
In the picker:
- Search for containers by name.
- Check the boxes of containers you want to pre-populate as swimlanes.
- Click Add N lane(s).
Each seeded lane is automatically bound to its C4 container and inherits the right nesting. You can skip the picker and add lanes manually afterward — seeding is optional, just a shortcut to avoid creating them one by one.
Style a lane that isn't bound to C4
A lane bound to a C4 element takes that element's colour and icon — nothing to set. A lane that stands for something outside the model ("Edge cache", "Payment provider") can still be styled: pick a Display type in the lane's form and it takes that type's colour and its icon, drawn beside the lane name exactly as a bound lane draws its element's. Display types live in Type & style settings on the C4 editor, so one name reads the same on every diagram of every kind. A lane bound to C4 ignores the field — the element it stands for wins.
Choosing good lanes
- Roles and systems, never people. "Billing", not "Alice".
- Stay under ~7 lanes. Beyond that, readability collapses — split the process into linked flows.
- Decide what each lane stands for before you start. An actor-lane and a container-lane in one flow is fine; a lane that means different things in different places is not.
Where next
- Add activities and connections — put the steps in.
- Link flows to your C4 model — bindings, zoom, and navigation.