Flow tips & tricks
Everything on this page is optional. A flow works without any of it — these are the moves that make one quick to build and easy for someone else to read. If you are still finding your feet, start with activities and connections.
Code is where you edit; the other levels are views of it
The four buttons above the canvas — Context / Container / Component / Code — are one control with one rule.

Code is the board itself — every step as authored, and the only level where the model can be changed. It carries a pencil in the editor so you can see at a glance which one that is. Add a step, draw a connection, re-point an end, delete something: all of it happens here.
The other three are abstractions of that board. Lanes bound to fine-grained C4 elements fold into their parents, and the steps they held merge into one counted card. Nothing there can be edited, because everything on screen may stand for several things you cannot see — a delete would take away more than you can point at.
They are not frozen, though: you can still arrange them. Drag a card at Context, Container or Component and it moves on that level only. The board at Code is untouched, and each level remembers its own arrangement, so the coarse view can read well without disturbing the detailed one. You can also rename what a level shows: a merged card and a rolled-up line each take a label that is true there and nowhere else.
Naming what a level shows
Select a folded card or a rolled-up line at Context, Container or Component and the pane offers its name at both scopes, so the choice is yours rather than the app's:
- Everywhere — the model's own text. Change it and it changes on every level and in every export. This is the one you want when the name was simply wrong.
- <Level> only — stored for that level and nowhere else, marked with a dot when it is set. This is the one you want when the coarse view needs to say something the steps underneath do not: "hands the order over", for three connections that each say "persist".
The ↺ beside the level field drops that deviation and goes straight back to the model's text. A call gets the same pair for its return label, so the answer arrow can read differently at a coarse level too.
Two things worth knowing. A card that folds several steps has no single name to change everywhere, and the pane says so instead of offering a dead field. A line that several connections roll up onto edits the one it takes its name from — the others keep theirs, and again the pane says which.
Changing a name is the one thing a level lets you do to the model, because renaming takes nothing away. Adding, deleting and re-pointing still belong to Code.
The editor tells you when you are on a view
Leave Code in the editor and a banner appears above the canvas: "<Level> is a view of your flow, not the flow itself." It states the split in one line — here you change how this level is laid out; to add, delete, re-point or rename anything in the model, you go to Code — and carries an Edit in Code button that takes you straight there.
So the rule of thumb is short: if you cannot do it, you are not on Code. A drag working while a delete does nothing is not a bug; it is the difference between arranging a view and editing a model.
The banner is an editor thing. The viewer never shows it: there is nothing to edit there and no Code level to send you to, so a warning about what you cannot change would only be noise.
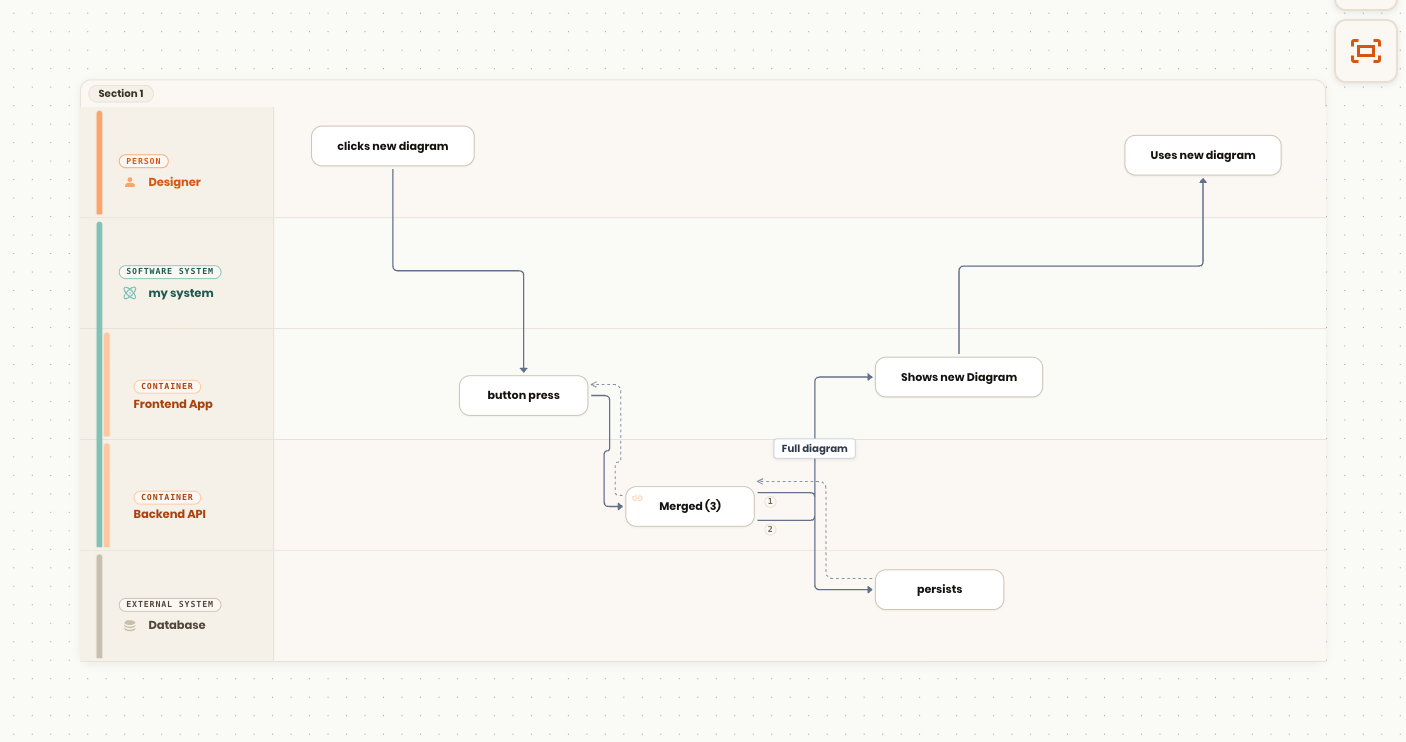
Tip — a fold that looks wrong is almost always a binding, not a bug. If a lane refuses to fold, or folds into the wrong parent, check its C4 element: the nesting is derived from your C4 model, not from the flow.
Tip — one section at a time. Each section card carries its own small level control, so you can leave the part of the flow you are discussing fully expanded while the rest stays summarized.
Let Auto place your lines, and pin only what you must
Every connection picks which side of each card it leaves from and arrives at. Auto takes the shortest route: each end attaches to the face its own card turns toward the other. Move a step and the line re-thinks itself; put a step above its predecessor and the line goes up, instead of leaving to the right and looping back.
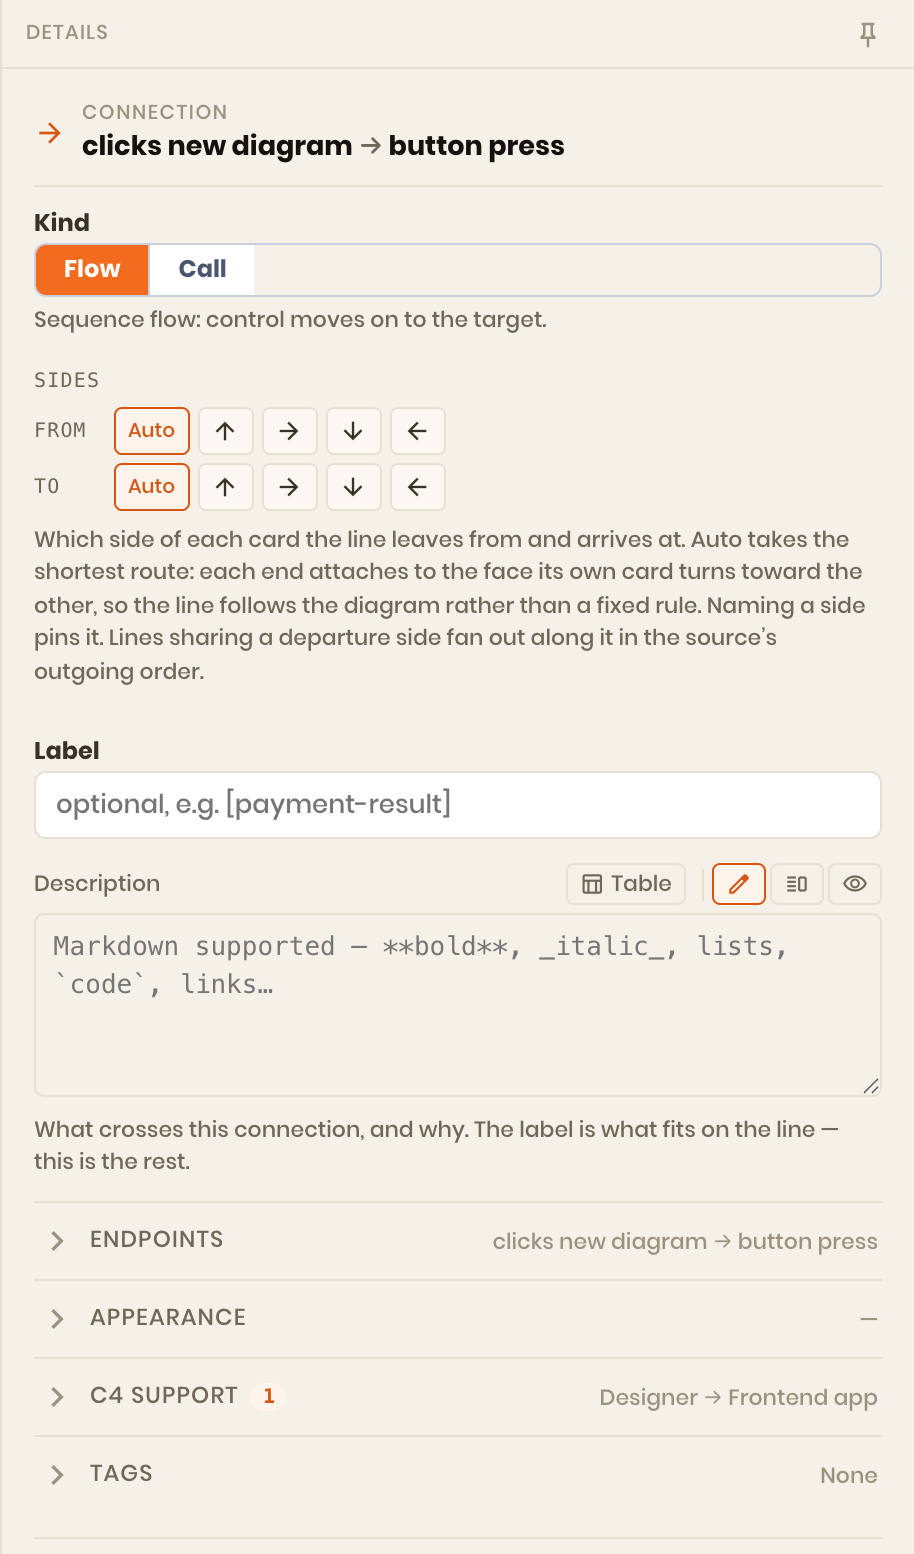
Pin a side only when you want the line somewhere the shortest route would not put it — to keep a column of lines parallel, say. Two ways:
- In the pane — the Sides block, one row per end. Auto is not a fifth value; it clears the choice and hands the side back.
- On the canvas — drag the line's end onto the side of the card you want. Dropping it on a different card re-points the connection and attaches it there, in one gesture.
Tip — changing Flow ⇄ Call keeps the line where it is. The kind no longer decides the side, so switching one does not make the line jump to another edge.
Read the order off the card
When a step has several outgoing connections, each gets a small number beside its departure point — 1, 2, 3 in the order they happen. The same numbers are listed in the step's Outgoing connections section, where up/down controls change them.
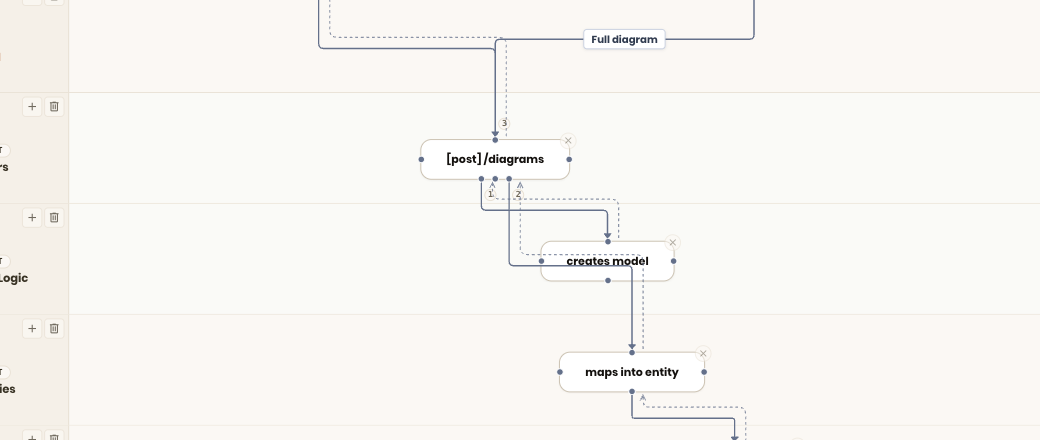
The numbers show everywhere — every level, and in the viewer — because the order is not a drawing aid, it is part of what the flow says: which of these things this step does first.
Lines sharing a side spread out along it in that order, so no two depart from the same point. Tip: if a fan looks crowded, give one of the lines its own side rather than reordering — a call heading down and a flow heading right read more clearly than four lines off one edge.
Why a line is straight — and why one isn't
A line between two steps you have put on the same row draws as one straight segment, even when its source fans several connections and has grown taller to hold them. The arrival slides along its side to meet its own departure, so the run stays level.
A line steps when its two cards are genuinely not aligned — more than the target's own edge can absorb. That step is information: it is telling you the two steps are not on the same row. If you want it straight, move the card, and the line will follow.
Tip — align by nudging. Select a card and use the arrow keys: each press moves it one grid cell, Shift + arrow moves five. It is far easier to line two steps up this way than by dragging.
Dashes, colours and widths are line styles
There is no per-connection "dashed" checkbox. A dashed line is a line style — define Async, Optional, Bulk once in the project's style settings (colour, width, solid/dashed/dotted, arrowhead) and name it from any connection's Line style picker. One vocabulary, shared with your C4 and deployment diagrams, so the same kind of line means the same thing everywhere. See Connection line styles.
Two dashes are drawn for you and are not style choices, because they say what the line means: a boundary-event exit path, and the return arrow of a call.
Build faster
- Drag to create. Drag from a step's connection handle and release on empty lane space: you get a new step, already connected, with its name selected — type and carry on. The bottom handle makes a call, the right handle a flow.
- Double-click to rename. On a card, double-click puts the cursor in its Name field. On a connection's label, double-click puts it in the Label field.
- Drag a C4 node onto the canvas from the editor's C4 Nodes panel to create a lane already bound to it.
- Move a label by dragging it along its own line; drop it back in the middle to clear the position.
- Nudge with the arrow keys — see above.
Check the flow against your architecture
A hand-off between two steps is a hand-off between two elements, so your C4 model has something to say about it. The editor's Validate connections button marks every line the model does not support, and a connection's pane carries a C4 support section listing the relationships that do support it — each a link to the diagram that draws it.
When you draw a line the model cannot support but can route — A talks to B, B talks to C, you drew A to C — the editor offers to insert the missing steps rather than refusing the line. The route only passes through peer elements — never a parent or child of either end, and only elements of the same type — so it never detours up through a containing system. Accept, and the intermediate steps appear in their own lanes; decline, and the line stays exactly as you drew it.
Help the reader
- Tags + Visibility. Tag steps and lanes ("happy-path", "error-handling"), and the viewer's Visibility panel lets a reader spotlight one reading — ghosting the rest, or hiding it.
- Boundary events are interactive. In the viewer, clicking a marker on a card shows that interruption's path. Keep error routes on markers instead of weaving them through the happy path.
- Link, don't cram. When a step deserves its own flow, give it a diagram link instead of ten more cards.
- Describe the line, not just the label. A connection's Description takes markdown and appears in the side panel and the exported document — the place for what the label could not fit.
Where next
- Add activities and connections — the mechanics these habits build on.
- Link flows to your C4 model — bindings, levels and cross-flow navigation.
- The F4 flow model — why one authored flow beats one drawing per audience.